Tuuli Madly Deeply… a tale of it was meant to be

Standard

TuuliDress

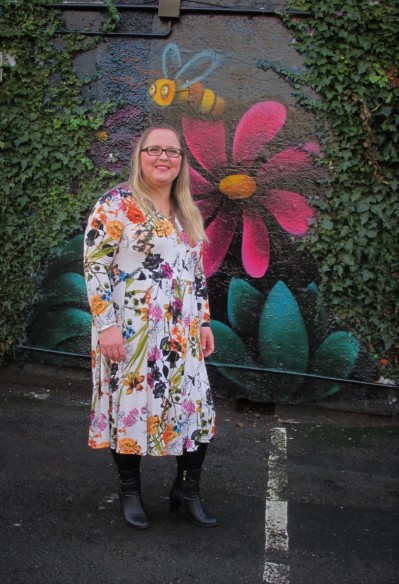
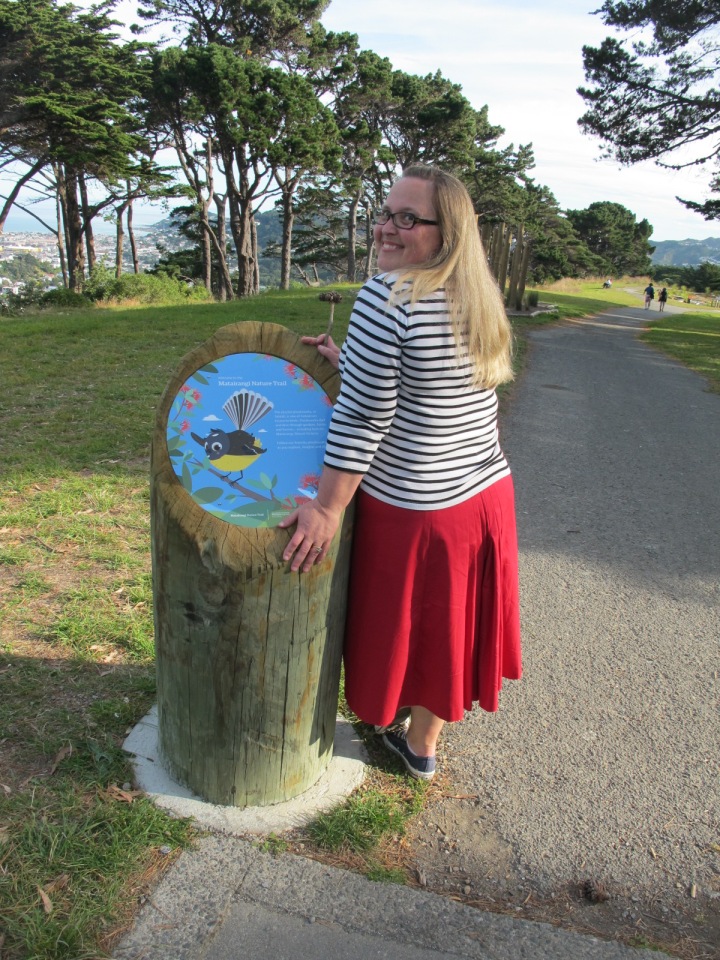
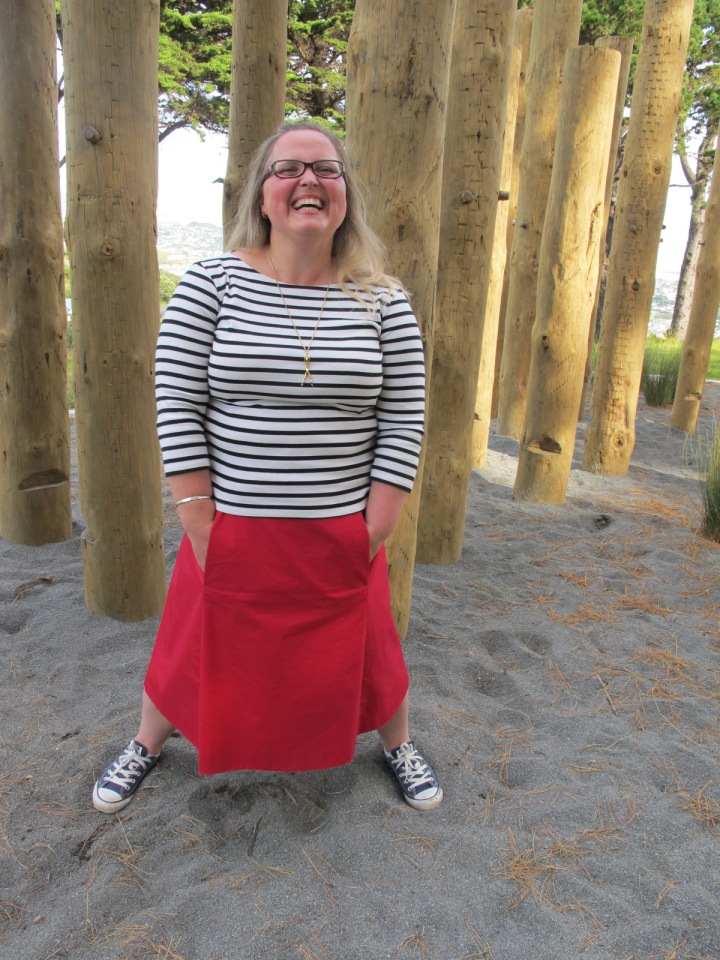
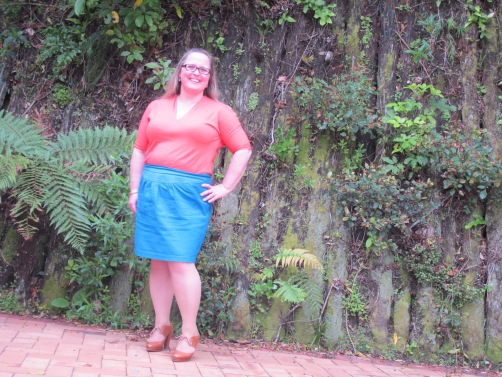
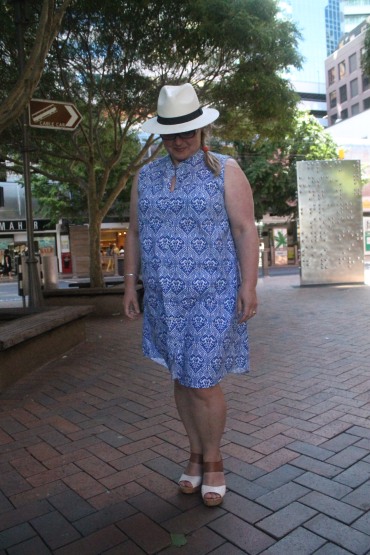
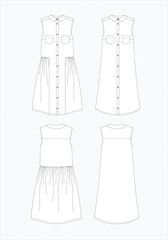
When Named released the Evolution Theory collection I fell in immediate love with the Tuuli Dress. Or to be more exact, the sample dress the model was wearing. I wanted it bad. It was one of those times where you see a pattern launch and wish you could buy the dress cause it’s so perfectly you. I bought the pattern as it was a style that appealed very much and figured I’d keep an eye out for fabric. So the pattern sat on the shelf, waiting.
 
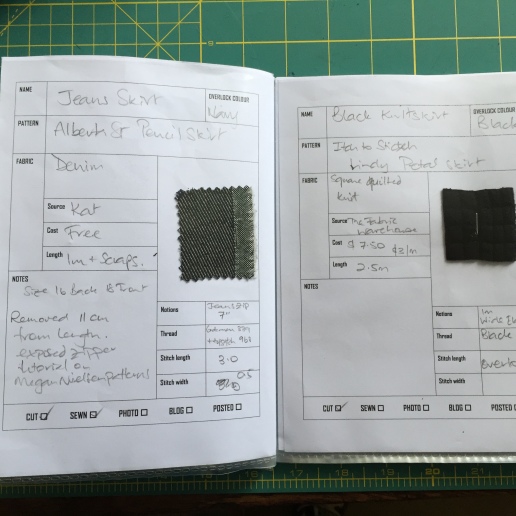
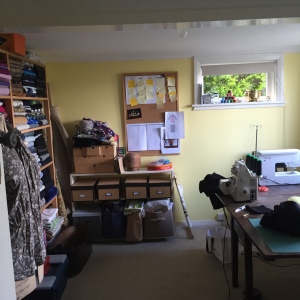
My fabric stash is in perfectly ordered rainbows on the shelves of my sewing room. People often tell me that having all my fabric on display is a bad idea because of sun fade. They are right, it is a risk. The room only gets morning sun and the sun is on the fabric at most for a few hours a day. However the UV levels are high in New Zealand so the sun is very strong and even a few of hours could cause fading. But I get so much joy from being able to see my fabrics. Running my hands over the piles imaging all the beautiful clothes I will make from them. I am not a particularly fast sewer, at my current rate of production of 20-30 garments a year I have at least 6 years’ worth of sewing on those shelves. Having the fabric on display inspires me in a way that having them in bins absolutely did not.

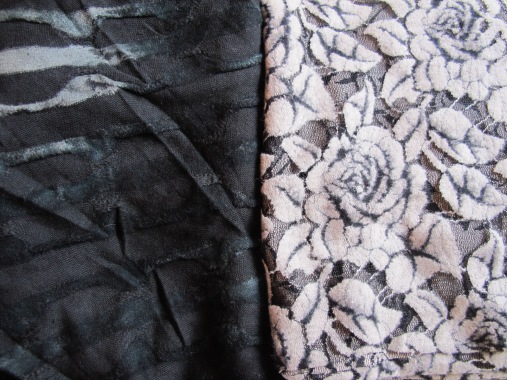
One day as I was sitting on the floor re-organising my patterns I pulled out the Tuuli dress and sighed, if only I could find the fabric for this. I looked up at my beautiful rainbows, straight at this jersey knit I had bought several years ago from Fabric.com to make a wrap dress.

IMG_7910a
Definition of Epiphany from Webster’s dictionary-
a (1) : a usually sudden manifestation or perception of the essential nature or meaning of something
(2) : an intuitive grasp of reality through something (such as an event) usually simple and striking
(3) : an illuminating discovery, realization, or disclosure
b : a revealing scene or moment
Or in my case, that big ole “duh!” moment. It was absolutely perfect for a Tuuli dress. Perfect larger scale floral on white background, perfect drape, perfect width for the skirt. Is there a lesson in this?  Mine are: 1. Don’t let anyone give you grief about the size of your Stash/Fabric collection; 2. Store it where you can see it; and 3. Shop your stash!
I adore this dress and more importantly I adore the way this dress looks on me and makes me feel.  The dress is super comfortable and very flattering. It makes me feel like I can conquer the world. I get a lot of compliments when I wear it and wearing it through the drab winter where everyone is dressed in unrelenting black makes me feel just that bit special.
IMG_7920

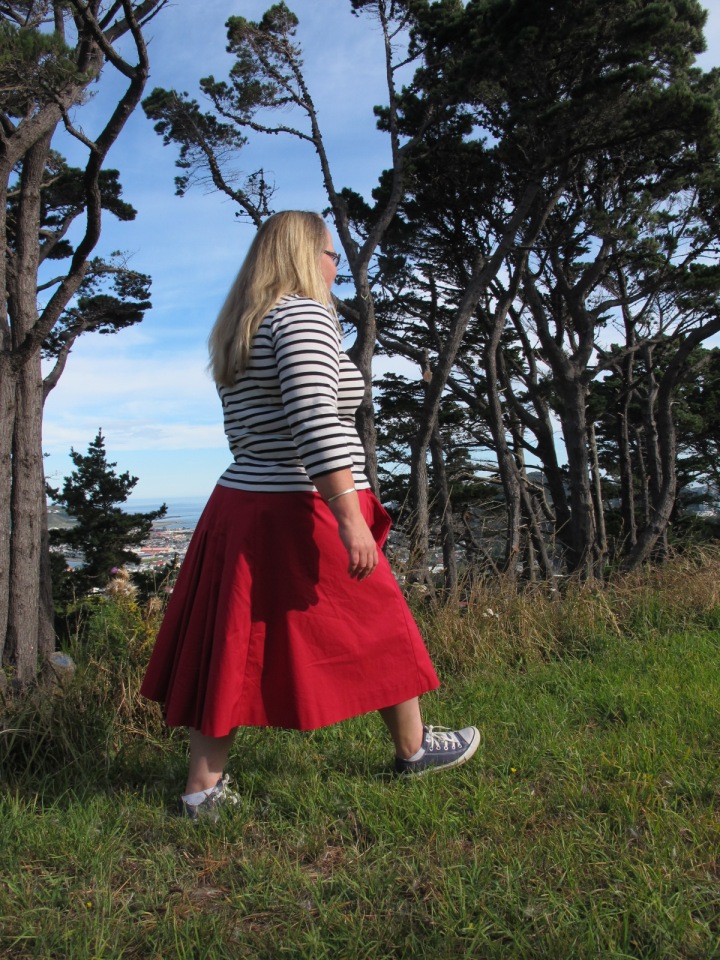
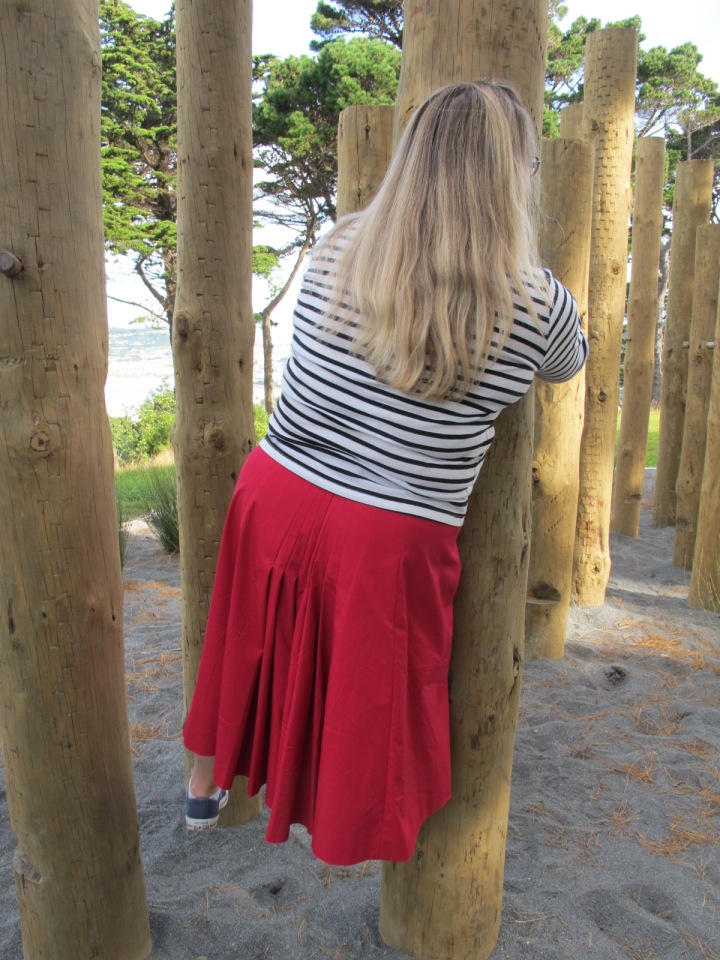
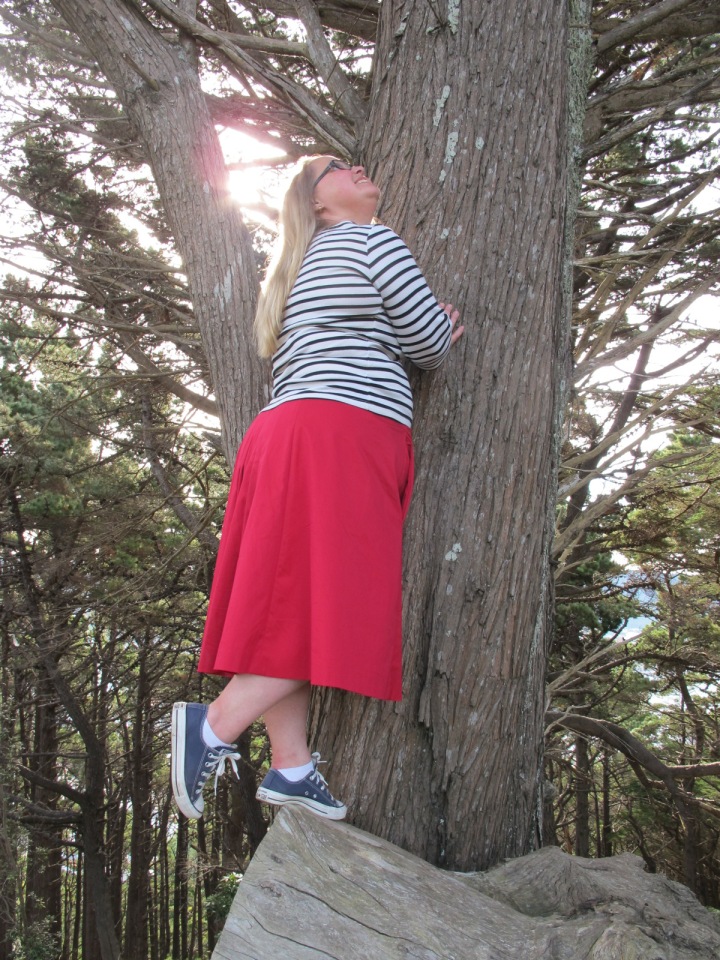
Not only was the dress meant to be, but apparently this blog post was meant to be too. Emma from Emma’s Atelier took these lovely photos for me last year at a WSBN meet up and I wrote the post to go with it. But then the SD card with the photos disappeared. I searched high and low but no joy,  I really loved Emma’s photos and was so bummed I decided I wouldn’t bother posting. Then a few days ago I put my hand down the side of an armchair and found it. I’m so happy to show you one of my most favourite makes and the lovely photos.


When good patterns go bad…

Standard
…in this instance it’s the fault of a rogue sewer.
 
Have you tried the Fantail skirt from Scroop patterns? I was a tester for this pattern and was really gung-ho and excited and very full of myself and confident. How could I not love a pattern named after one of our most delightful birds?
 
The pattern sewed up beautifully, and I love my test version. So much swooshy! Just like actual fantails which fly in flurries of swoops from tree to tree. The back pleats fall just so and the pattern has the best waistband instructions I have ever come across. The order you attach it to the skirt is different which gives a very clean and polished look inside and out.

IMG_7786

 
There was just one tiny problem.  Right before the testing period I had decided I couldn’t bear having to wear my security card on a lanyard anymore and that all my clothes had to have pockets. And the fantail skirt doesn’t have pockets. Yep I was that rogue tester who doesn’t just make the pattern as per instructions but decides to go do their own thing. (BAD testing etiquette Nina!) I talked to Leimomi during testing about wanting pockets and she was interested to see how it would go. She had experimented with a pocketed version during development but made the decision to release the final pattern without. I figured I could just insert pockets on the sides of the front panel and all would be well – HA! They draw waaay too much attention to my tummy and they don’t sit nicely.
 IMG_7721
The fabric is a lovely red cotton that had been in my stash for a number of years. I tend to wear the skirt with my favourite striped t-shirt (must clone this top) or with a camisole and cardigan. In my mind this translates into a very French vibe and when wearing this I find myself walking down the street having school girl French conversations in my head pretending I’m a sophisticated parisienne.
IMG_7835
 
For these photos I went to a new playground up the road from me and tried to channel my best fantail impression, with minimal success. Not so much gracefully swooping from pole to pole more clinging on for dear life.
IMG_7689
And then I decided to climb trees??!!?? I think I was feeling “whimsical”.
IMG_7738
 
Happily for any future Fantail skirt makers Leimomi took one of the more successful experiments she did while developing the pattern and put up a tutorial for a pocket version on her blog. Check it out here. Unhappily for me I didn’t  have quite enough fabric left to re make the skirt with this much better pocket design so I sadly admitted to myself that I would have to give up my pockets and redo the front.
 IMG_7749
Fixing my mistake took longer than anticipated, I knew I didn’t like the way the pockets looked, but the skirt was so comfortable and fun to wear it just wouldn’t come out of wardrobe rotation long enough to go into the fixing pile. It’s all fixed now but I’m glad I got these photos as I’ve given up waiting to get new ones after removing the pockets and figured I’d just show off my fun skirt with the bad pockets.
IMG_7707
 
If you want to check out a real Fantail have a look here


Pretty Pyjamas

Standard

It was the deepest darkest depths of winter we were miserable, cold and grumpy. We needed sunshine. So one lunch break the Boat Builder and I went to our friendly travel agent full of dreams of beautiful beaches and snorkelling in warm seas. He recommended Tonga and having never been there, but sold on the photos of white sandy beaches, beautiful Fales and tropical fish, we signed up immediately.

I did have a small problem though. No summer pyjamas. My husband bought the Carolyn pyjamas pattern for me for Christmas last year along with the Ginger Jeans but both had been sitting in the scary pile waiting for me to woman up. Nothing like a deadline to suddenly motivate you.

IMG_7937

I had the perfect fabric sitting in the stash that came from a local fabric store pop up sale. $3 per metre –way too cheap for fabric so lovely. It is a soft cotton voile with a red and yellow check and was a last minute decision as I waited in the queue to get my fabric cut. I grabbed the roll thinking it would be good to use for a muslin. The buttons came from my button stash. I got them a few years ago from a vintage seller at Fabric-a-Brac. I love how delicate they are and think they suit perfectly. Stashing for the win!

IMG_7941

With fabric so light and translucent I decided to use French seams everywhere.  I even French seamed those tricky crotch and sleeve head seams.

IMG_7944

There’s only two things I’m not happy with. I think the shorts are a little too short. I’d like them to be about 1cm longer in the leg length. And I’m not sure what I did wrong with the facing at the shoulder seams but it didn’t meet up neatly.  I ended up using the pinking shears which means they won’t fray at least. I didn’t pipe these as the fabric was so light and I wanted to keep them very simple

I did take a couple of photos with me in them, It’s always nicest if you see a real person in the clothes. Can you see all the goose bumps in the in spite of the thermals underneath?  It was cold that day, but in Tonga they were perfect.

The pyjama pattern is great and I do have fabric and trim sitting ready for when I make up my “proper” version. But will probably need to book another holiday somewhere cold to get that version moved further up the sewing queue.

Parrots and Florals and Collars – Oh My!

Standard

A few months before Christmas a very dear friend of mine asked me if I would make him a shirt. Now this is something I would never normally do as my sewing time is precious and I’m so slow it takes ages to finish projects. However Leon is one of the loveliest people I know and married to my best friend. He is also a fabric rep and wanted it for his work Christmas party. I knew this probably wouldn’t be any old fabric/shirt.Turns out it wasn’t – it was six fabrics.

IMG_7477

Or rather two fabrics in three colour ways each. The front and back are a heavy linen with parrots all over, the sleeves are a lighter linen with giant Hibiscus flowers.

With fabric as bold as this and knowing Leon has the personality to pull it off I borrowed a 1970s pattern from the Made Marion shirt pattern library. (If you’re based in Wellington and don’t know about it, Maryanne has a huge collection of men’s shirt patterns that they will lend for a gold coin donation.)

img_7652.jpg

Those collars! That mustache!

Butterick 4712 had the look I wanted that wouldn’t chop up the prints too much. When cutting out I made  sure every single pattern piece was a different colour way from the next. I didn’t bother with the pockets or epaulets as I wanted the parrots to be the stars. In fact I loved the parrots so much I put an extra one on the collar.

img_7472.jpg

This is probably one of my all time favourite makes. The fabric and the oversized details just made it a joy to sew. I have to admit I felt a real pang seeing it go out the door.


Leon loved it though and it was a huge hit at his office Christmas party. He wore it steadily through the Christmas party season and I got to see it in action at a BBQ at his house on the beach on Boxing Day. I was in full on sewing smug mode at all the compliments he got 😉

Psst don’t tell Leon but I only ended up needing four of the fabrics so got to keep the two more muted versions.

IMG_7846

Florals and Parrots! Oh my!

Summer is a fickle love in Wellington

Standard

Last year we moved from living on the flat by the beach to the top of a hill. We live on Whataitai,  the taniwha that was left behind when Wellington harbour was formed. It’s one of my favourite Maori legends and something I think about a lot at the moment after our recent spate of earthquakes and people trying to make sense of the world around them. It’s been interesting living up here, the roads are narrow and twisty and steep but bus loads of tourists persist in venturing up the hill to go to the Mt Victoria lookout and then on to film locations for the Lord of the Rings movies. We have the luxury of a large car pad outside our house and we often get people parking there thinking it’s the car park for the lookout.

Each morning I walk down the hill to work and watch the cruise ships come in. If it’s sunny the streets will be full of happy tourists remarking how lovely Wellington is. If it’s grey and cloudy  the streets will be full of puzzled tourists trying to figure out why people live in Wellington. If it’s raining I’m normally on my scooter heading down the hill as fast as I can, knowing the streets will be full of disgruntled and grumpy tourists wondering if they can get their money back on this Wellington stop.

Which is why even though it’s summer one of my latest makes is another Jenna cardigan. I cut it out at the beginning of February when we had a big southerly blow through and it got cold. Made it up over that weekend when it was rainy. Just in time for the sun to decide to come out and we had a forecast of 5 sunny days in a row and temperatures in the mid 20s. Summer is a fickle love in Wellington.

IMG_7841

This is my  seventh version of the Jenna pattern. Every single one has been different and I’ve loved and worn them all to death. Kat made up a pretty floral yoked version and I was smitten and wanted it for myself but we are vastly different body shapes so I couldn’t just steal it out of her wardrobe which was my original thought when I saw it. Anyone else ever feel really lazy about sewing and just think of going into another sewer’s house and nicking their version? Just me then? I’ll never be invited round again now that cat’s out if the bag.

The front panels are a soft and drapey synthetic knit printed with a floral photograph which I picked up from a designer pop up shop when they were selling off previous seasons fabrics. I paired it with a super light black merino I had in the stash and voila! A gorgeous beautiful new cardigan it’s too bloody hot to wear.

But it’s Wellington in Summer, so I’ll probably have worn it seventeen times next week.

IMG_7844

It’s getting harder now

Standard

So over the last couple of years I’ve been thinking about things I’ve never made that seemed tricky and hard and would probably challenge me to improve my skills. On the list was a collared shirt. I have a wide back, a reasonable amount up front boob wise and a large belly so I find shirts really hard to buy. In fact I only own one – which I don’t wear cause it doesn’t fit properly. Then I saw a sewing class for collared shirts, and then my husband asked  if I would make something for him. Dun dun dun fates decreed that I would learn how to sew a shirt. Collar, flat felled seams, plackets and cuffs – eeeeep!

The pattern I used is McCall’s 6044 but I bought the wrong size it’s too big, I should have bought a large. However maths is amongst the things the Boat Builder is rather good at so it made a nice puzzle for him calculating the decreases – only fair it’s his shirt! The pattern also didn’t have a yoke or sleeve plackets but the sewing class covered how to add those.

img_7651

I had some heavier weight white stretch cotton with a slight waffle weave in the stash that would do nicely. And cut up an old check shirt of his to use for the inside collar stand, placket and cuffs and snipped off the buttons to reuse – waste not want not ;-).

My husband has a large neck and we find it really difficult to buy shirts for him. If he wants to wear a tie it has to be a custom made shirt, which is not cheap. I measured his neck and increased the collar and stand pattern pieces, then made up the collar but it was too small, UGH. I increased them again and made the most perfect collar I’ve ever done, again too small, ARGH. I increased them again and while this version isn’t the most perfect collar and stand in the world and certainly not as perfect as my second attempt, it does button up and that’s what’s important when wearing a tie.

IMG_2828

I think it turned out rather well for a first attempt. I need to decrease the shoulder width slightly on any future version and I’ll change the sleeve from a two piece to a single piece, but the Boat Builder is looking fine.


The cat’s pyjamas

Standard

Something else I’ve done to extend myself with sewing is volunteering to be a pattern tester. I have a background in desktop publishing so figure I balance my lower skill level with awesome proofreading skills when giving feedback. And for once the latest thing I’ve tested I actually have photos for a blog post! It’s the new Miramar dress from Scroop Patterns.

miramar_hero_image_1024x1024

I’m seriously in love with this pattern. Leimomi of The Dreamstress & Scroop Patterns has offered it as a project for her sewing lessons in the past and I had been strongly tempted. But it’s a fairly simple pattern that’s suitable for beginners and I am quite comfortable with knits so prefer classes that are a bit trickier. Which means I was happy dancing when she said it would be her next pattern release and I was dead keen to try it.

img_7273

The dress is so comfortable it’s secret pyjama dressing. You can pretty much tell if I like a pattern as I put it on to wear straight away. As soon as I finished this I tried it on to twirl and then didn’t bother putting my old clothes back on. Anyone else do that when they are super happy with something?

img_7398

 I love the colour of the dress and the small abstract print. What isn’t good though is the amount of stretch in the fabric. Initially Leimomi recommended at least 25% stretch both ways, which this has, but the arms are tighter than I’d like. I can still wear it but I’m aware of it. She has changed the recommendation to at least 30% stretch and my advice is pay attention. She also  increased the sleeve size by 1 cm.

I liked the dress so much I promptly bought some orange merino that day to make a top version and the sleeves are better with more stretch.

img_7434

The top survived an eight hour day, the skirt not so much – wrinkles!

Speaking of sleeves, I left the ends raw on the dress. I’m going to wear it a bit more before I decide on final length. I’m thinking to cut them to above my elbow or possibly at a ¾ length. For the top version I marked a line 3cm below the short sleeve version and that came out to just above my elbow which  I really like and is good for work.

The dress I made a size 46and graded out to a 48 from the waist as I wanted a bit more of a twirly skirt – forgetting I live in one of the windiest places on earth! When we took the photos I yet again involuntarily showed the cars passing by the colour of my knickers. When will I learn??!!!

img_7294

Actually I did learn cause I wore it to work with high heels and a full slip later in the week and there were no naughty flashes even riding the scooter. But I think that a number of testers made the same alteration as in the final release version Leimomi has redrafted from the waist to taper out more. For the top version I just made a straight 46 and it fits really well. The only change I made after trying the top on to check the fit was to sew up the front seam an extra 3 cm. The dress version was fine but the different fabric meant I was showing a little more cleavage than I’m comfortable with for work. But I’m short and am self conscious in lower necklines as most people can look straight down my cleavage so I’d suggest trying it and then making up your mind like I did.

This is a non seasonal pattern, I’ve made it in two lighter weight fabrics suitable for the summer coming up but I’ve seen it made up in mid weight ponte and heavier weight merino which look awesome. I’m hoping that there will be a heavyweight raspberry merino in The Fabric Store when they stock for autumn/winter. Although looking at the Pantone predictions for 2016 I might have to settle for spicy mustard instead. I just know there will be a winter version in my future along with a mid weight white top version for work.

And you know what else is nice? In our new house we overlook the Miramar peninsula the dress is named for… pretty, like the pattern.

img_7455crop

Taming the chaos within

Standard

My blog posts don’t reflect my sewing output. I’m sewing a lot and have put a focus on trying new things to extend my skills. Such as a business shirt for the Boat Builder and experimenting with trousers for me. Still on the list of scary things to tackle are a wool coat, a bra, jeans and a swimsuit. I’ve sewn a number of dresses, multiple versions of Linden sweatshirts and scout tees and various skirts. And have almost finished another corset – pesky hand sewing! As much as I sew for every piece I finish there’s probably four or five things cut out or half finished and then a huge stack of fabric and patterns behind that. It was getting overwhelming and I was starting to get a paralysis of indecision on what to do next. I felt like I was “drowning” in piles of unfinished projects that had been stopped because I didn’t know how to do the next step or I suddenly got bored of it , or something shinier had come along, New patterns! New fabrics!  Oh my! My ‘To Sew List’ was starting to be stressful and I was getting irritated with myself. Compounding this is that I seem to have stopped buying clothes and things were starting to get a bit desperate wardrobe wise.

And then we moved. And everything got packed away for two months.boxes
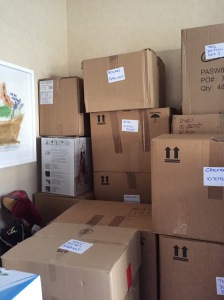
The new house is awesome, we looked for five years until we finally found one with just about everything we wanted (Boat Builder didn’t get the internal access garage and I didn’t get the walk in wardrobe), and just enough things that need to be fixed or renovated to make it interesting and at a price we could remotely afford without giving up everything else in our lives. But stopping was good. I missed sewing very much, but it gave me a bit of space from all the self inflicted chaos and disorganisation that was surrounding me. I did a big cull of fabric and other stuff before we packed so I knew I only had projects that actually inspired me or would really challenge me. The new house has a basement so now we have a room that’s just for hobbies – luxury I know. At the moment it’s solely for sewing, the BB has hit pause while he does some serious thinking about the next step on the yacht and does some house projects instead. But tucked into the corner of the room is my grandfather’s loom and when I’m feeling confident I’ll be able to set that up too.

While everything was packed away I decided to bring a few of my work habits home (my day job is project planning) and drew up a Kanban board for myself and added my current queue as post it notes. kanban

I then divided my current sewing ideas into seasons and made a long term sewing goals list. long-term-plan

I also created a sewing projects book. I found that when I kept stopping and starting projects I would forget what thread and stitch length etc. I had used, or I’d lose the piece of paper when I remembered to write them down. I also thought it would help me to keep a record of what I had done, changes made to the pattern and where I’d gotten the fabric etc. I figured it would be helpful writing blog posts if I ever got to the point where I posted more than once in a blue moon. I staple a little swatch of the fabric to the page as well and I loves it. It’s so nice to flip through and see my “history” at a glance.

img_0424

When it came to unpacking the six very large suitcases of fabric I wanted to take my time and organise my stash so that I could see it. I’d loved all the fabric on the shelves at the old house but they quickly got messed up and fell all over each other. I borrowed an idea from the fabric shops and made myself a template and proceeded to cut up the many cardboard boxes left over after the move.

Then as I unpacked each case I wrapped the fabric round the cardboard “holder”. So now I have nice even stacks ordered by colour. I can see exactly what I’ve got and feel very inspired when I walk in the room. I pinned the Kanban board and long term goals sheet to a board on the wall. Put the patterns in open boxes on the bottom shelves and bought myself four more of the boxes, two to store unfinished projects in, and one each for interfacing and trims/sundries. I gave myself a new rule I had to alternate starting a new project with finishing something from the boxes.

The room has stayed tidy. I find the space really calming and a joy to work in. The chaos outside and in has gone –  and best of all my productivity has gone up!

whole-room

The almost dress…

Standard

IMG_9151

 … as in I almost got it right. It should be perfect, but I let myself and my inherent laziness get in the way. I love this dress but…

IMG_3340

The fabric: I love Ikat fabric and I love blue so it should be perfect right? Well the hand of the fabric is wonderful and soft and exactly right for this style. Holds it’s shape and wears like a dream. And as a bonus the fabric doesn’t crease. But a proper Ikat is where the pattern is dyed onto the threads before it is woven, this has been printed onto the woven fabric. So the fabric is almost right… but just wrong enough to niggle.

13001Illustration_medium

The pattern: I bought the fabric with the Grainline Alder dress in mind. I intended to do view B with the gathered back and have a collar, however I didn’t think to check I would have enough fabric. I just kind of thought it was about enough… but no, apparently my mind’s eye measuring is a bit dodgy – there wasn’t enough fabric. I made view A with no collar.  So the pattern is perfect for the fabric and it’s almost the dress style I wanted.

Pattern placement: Because I was tight on fabric it was a case of what will fit when laying out. Having said that, I’m sure I could have lain the front pieces out in a single layer and still had enough. IMG_9162
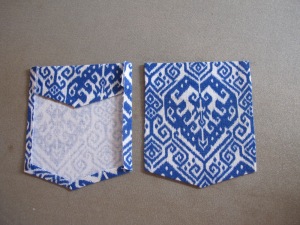
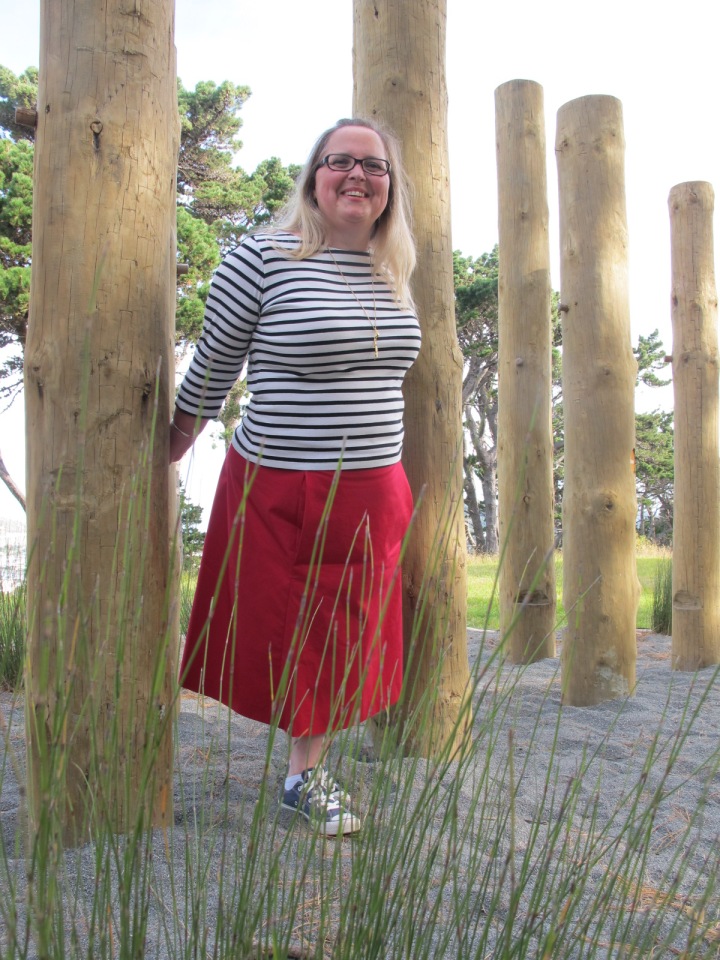
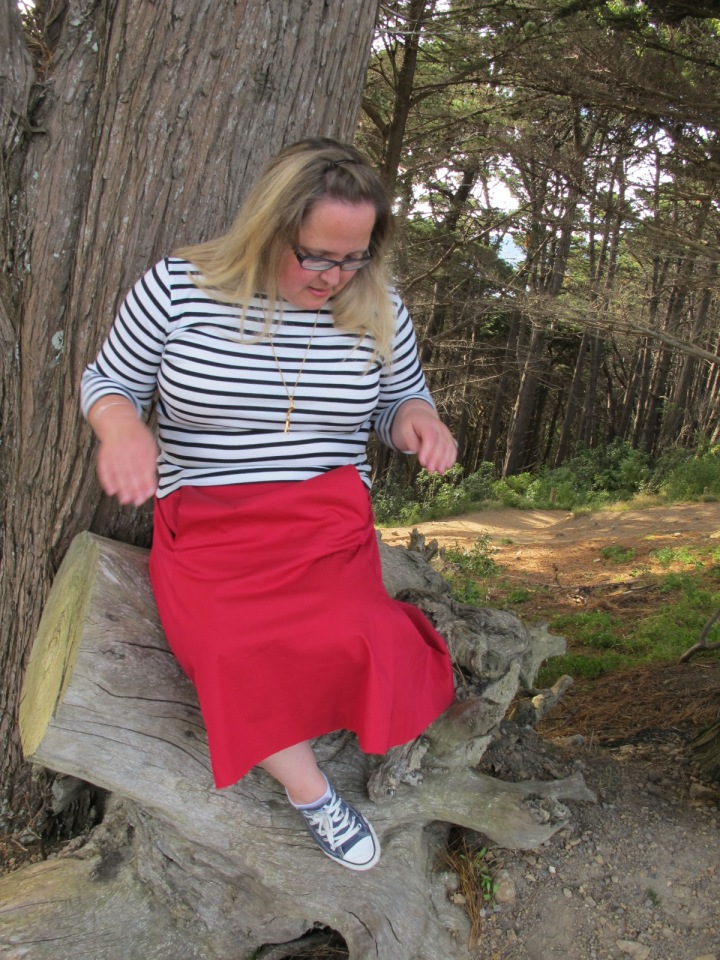
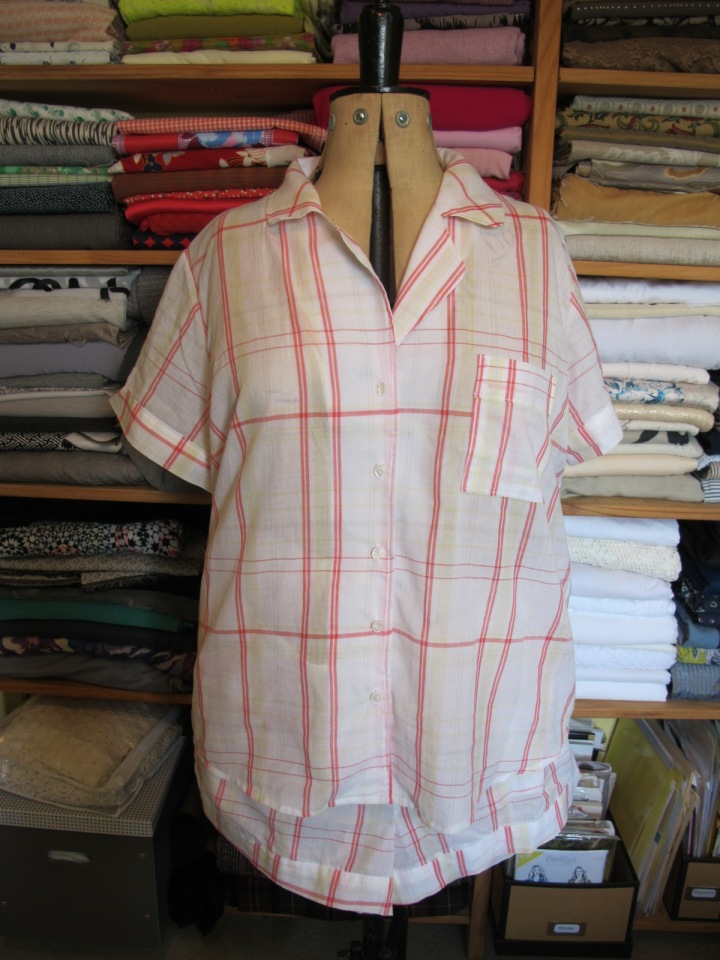
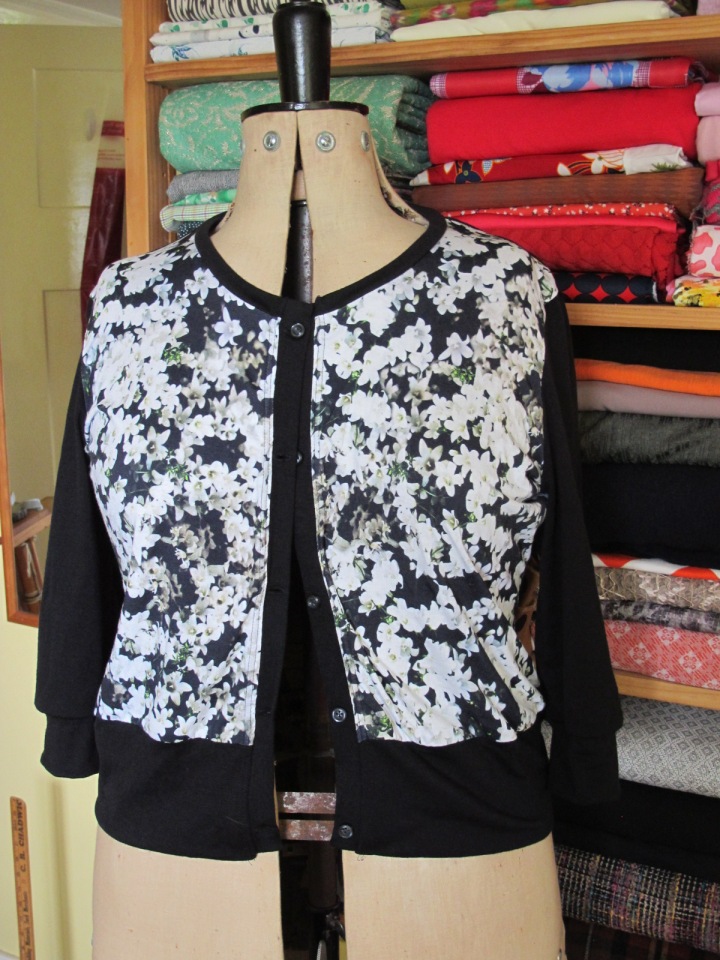
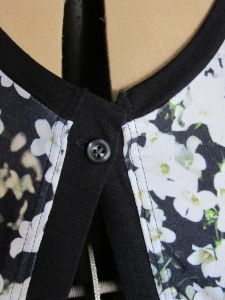
Which would have prevented the seeing double on the front. It’s annoying because I cared enough to make sure the button placket and pockets match perfectly which makes the left side/right side non match stand out more to my eye. Grrr

Sewing: The actual sewing part is mostly fine. Seams are straight, finishes look nice, pattern matching (when I actually thought about it) is pretty much perfect. The techniques are ok and I loved having the Grainline Alder sew-a-long to follow. Especially as they showed a really clean way to finish the collar stand. But the overall length is too long I think for my height and the back is marginally longer than the front,  I need to actually finally admit it, stop being lazy and adjust it.

So… I have a dress which is a pleasure to wear but when I wear it I can’t help noticing all the “faults”. When I started to get serious about sewing two years ago it was to try and avoid feeling like this.  Le sigh

There is one thing that is absolutely perfect about this dress though, it’s perfect for the muggy summer heat and I practically lived in this dress. So it can’t be all bad can it? 😉

IMG_9173

Production line sewing

Standard

Last winter I was stomping around my wardrobe muttering about fancy frocks and freezing weather and decided I need some cardigans, something fancy, something comfy and something in-between. I figured if they were all black and I sewed them together I could make a production line and get through them quickly and have useful things in my wardrobe which would allow me to wear my pretty clothes but still be warm.

It also had the lucky benefit of there being nothing suitable in my stash as I don’t have a lot of black and there’s very little knit in there either.  Sooo – shopping trip! I zipped out to The Fabric Warehouse on the scooter and found these.

IMG_3313

Ok I know the floral is beige but it’s on a black background so could still use black thread.

I decided to use the Jenna Cardigan for these two as I had been really pleased with my first version (not blogged). I love that Kat tries to make her Muse patterns as versatile as possible so that you can use them again and again but still have a different finished product. The beige floral is waist length with short sleeves but using the sleeve band to make it puff a little.

The stripe I decided to see how the long sleeve hip length version would look. The only alteration I made on both was to trim about 7mm from the shoulder seam as I found the shoulders on my first, even on my wide shoulders, was a little too big. For the stripe that was fine but the beige floral doesn’t have as much stretch and probably could have been left as per my original.

The third version would be was the already cut out black Nina cardigan which had been still in the queue since last year. I had six metres of this stuff originally and it has been really convenient to have in the stash for all sorts of things and is nearly all used up. I think I have just enough to make a top (maybe two) and then it will be gone :-(.

Normally I pin sew, pin sew and it can be very slow but this way I make fewer mistakes. However as I had made both these styles before I knew what I could pin together en masse so that I could just sit at the machine and sew seam after seam.  Zoom zoom zoom it was so satisfying. Doing a production line meant that I completed all three in one weekend which is unheard of for me – such Speedy Gonzales sewing I love it!